# ZARA仿写
一、首页(无限轮播图)
首先给出无限轮播图的效果图
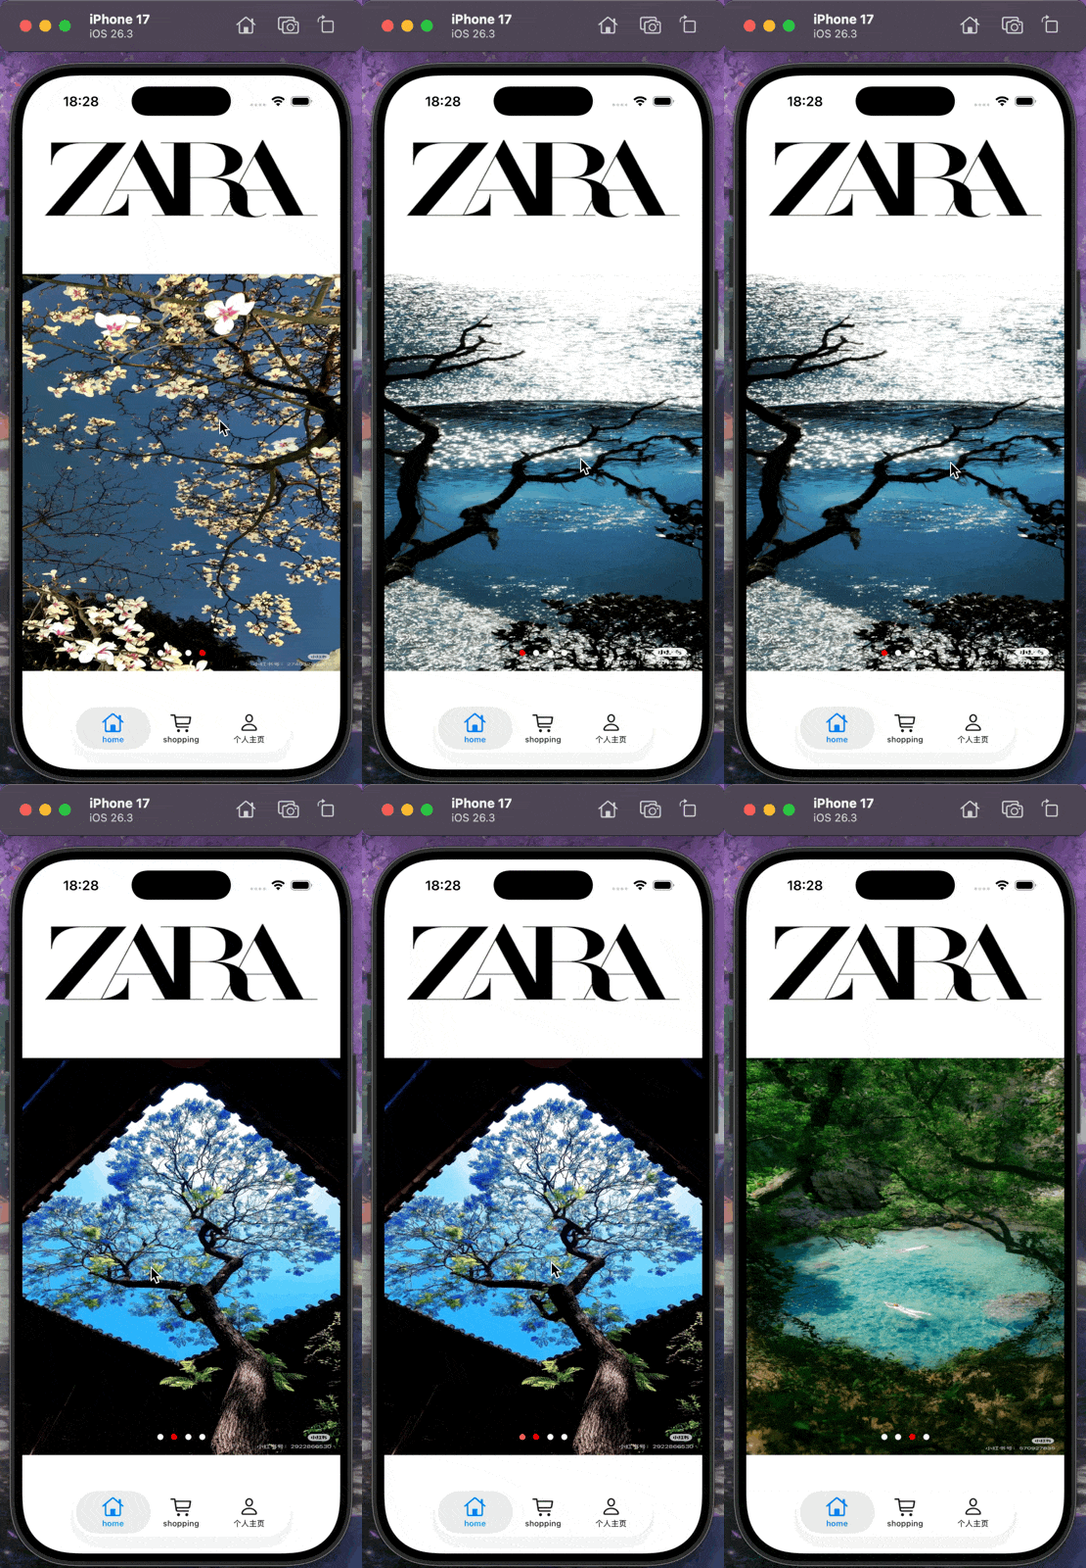
我们通过一个- (void)scrollViewDidScroll:(UIScrollView *)scrollView这个函数可以获取我们的UIScrollVIew的位置,我们可以在我们的视图滑到倒数第二张照片的后面的时候,我们直接通过这个代码来修改我们的位置,在第二张图片的位置我们在向前滑动时候,然后将这个UIScrollView的位置改到倒数第二张的位置,这样我们就可以在视觉上展示出一个无限轮播图的效果
具体见我的博客无限轮播图学习
代码如下
@interface HomeViewController () <UIScrollViewDelegate>

@property(nonatomic, strong) UIScrollView* scrollView;
@property(nonatomic, strong) UIView* contentView;
@property(nonatomic, strong) NSTimer* autoScrollTimer;
@property(nonatomic, strong) UIPageControl* pageControll;
@property(nonatomic, strong) NSArray<NSString*>* imageName;

@end

@implementation HomeViewController

- (void)viewDidLoad {
    [super viewDidLoad];
    self.scrollView = [[UIScrollView alloc] init];
    self.scrollView.pagingEnabled = YES;
    self.scrollView.delegate = self;
    self.scrollView.showsVerticalScrollIndicator = NO;
    [self.view addSubview:self.scrollView];
    [self.scrollView mas_makeConstraints:^(MASConstraintMaker *make) {
        make.top.equalTo(self.view.mas_top).offset(250);
        make.left.right.equalTo(self.view);
        make.height.mas_equalTo(500);
    }];

    UIImage* zaraImage = [UIImage imageNamed:@"ZARA"];
    UIImageView* zaraImageView = [[UIImageView alloc] initWithImage:zaraImage];
    [self.view addSubview:zaraImageView];
    [zaraImageView mas_makeConstraints:^(MASConstraintMaker *make) {
        make.left.right.equalTo(self.view);
        make.top.equalTo(self.view).offset(40);
        make.bottom.equalTo(self.scrollView.mas_top).offset(-30);
    }];

    self.contentView = [[UIView alloc] init];
    [self.scrollView addSubview:self.contentView];
    [self.contentView mas_makeConstraints:^(MASConstraintMaker *make) {
        make.edges.equalTo(self.scrollView);
        make.height.equalTo(self.scrollView);
    }];
    self.imageName = @[@"UI4", @"UI1", @"UI2", @"UI3", @"UI4", @"UI1"];
    UIView* previousView = nil;
    for (int i = 0; i < self.imageName.count; i++) {
        UIImage* image = [UIImage imageNamed:self.imageName[i]];
        UIImageView* imageView = [[UIImageView alloc] initWithImage:image];
        [self.contentView addSubview:imageView];
        [imageView mas_makeConstraints:^(MASConstraintMaker *make) {
            make.top.bottom.equalTo(self.contentView);
            make.width.equalTo(self.scrollView);
            if(previousView) {
                make.left.equalTo(previousView.mas_right);
            } else {
                make.left.equalTo(self.contentView);
            }
        }];
        previousView = imageView;
    }
    [previousView mas_makeConstraints:^(MASConstraintMaker *make) {
        make.right.equalTo(self.contentView.mas_right);
    }];
    self.pageControll = [[UIPageControl alloc] init];
    self.pageControll.currentPageIndicatorTintColor = [UIColor redColor];
    self.pageControll.pageIndicatorTintColor = [UIColor whiteColor];
    self.pageControll.numberOfPages = 4;
    self.pageControll.currentPage = 0;
    [self.view addSubview:self.pageControll];
    [self.pageControll mas_makeConstraints:^(MASConstraintMaker *make) {
        make.bottom.equalTo(self.scrollView.mas_bottom).offset(-10);
        make.centerX.equalTo(self.scrollView);
    }];
}
-(void)scrollToRealFirst{
    dispatch_async(dispatch_get_main_queue(), ^{
        CGFloat width = self.scrollView.frame.size.width;
        [self.scrollView setContentOffset:CGPointMake(width, 0)animated:NO];
    });
}
-(void)startAutoScroll{
    self.autoScrollTimer = [NSTimer scheduledTimerWithTimeInterval:2.5 target:self selector:@selector(scrollToNext) userInfo:nil repeats:YES];
}
-(void)endAutoScroll{
    [self.autoScrollTimer invalidate];
    self.autoScrollTimer = nil;
}
-(void)scrollToNext{
    CGFloat width = self.scrollView.frame.size.width;
    CGFloat nextX = self.scrollView.contentOffset.x + width;
    [self.scrollView setContentOffset:CGPointMake(nextX, 0) animated:YES];
}
-(void)scrollViewDidScroll:(UIScrollView *)scrollView {
    CGFloat pageWidth = self.scrollView.frame.size.width;
    CGFloat offSetX = scrollView.contentOffset.x;
    if (offSetX < pageWidth) {
        CGFloat realLastX = pageWidth * (self.imageName.count - 2);
        [scrollView setContentOffset:CGPointMake(realLastX, 0)animated:NO];
    }
    if(offSetX >= pageWidth * (self.imageName.count - 1)) {
        [scrollView setContentOffset:CGPointMake(pageWidth, 0) animated:NO];
    }
    NSInteger index = scrollView.contentOffset.x / pageWidth;
    NSInteger page;
    if (index == 0) {
        page = 3;
    } else if (index == self.imageName.count - 1) {
        page = 0;
    } else {
        page = index - 1;
    }
    self.pageControll.currentPage = page;
}
-(void)scrollViewWillBeginDragging:(UIScrollView *)scrollView {
    [self endAutoScroll];
}
-(void)scrollViewDidEndDragging:(UIScrollView *)scrollView willDecelerate:(BOOL)decelerate {
    [self startAutoScroll];
}
-(void)viewDidAppear:(BOOL)animated {
    [super viewDidAppear:animated];
    [self scrollToRealFirst];
    [self startAutoScroll];
}
-(void)viewDidDisappear:(BOOL)animated {
    [super viewDidDisappear:animated];
    [self endAutoScroll];
}
二、分类页(UISegmentedControl和UIScrollerView)
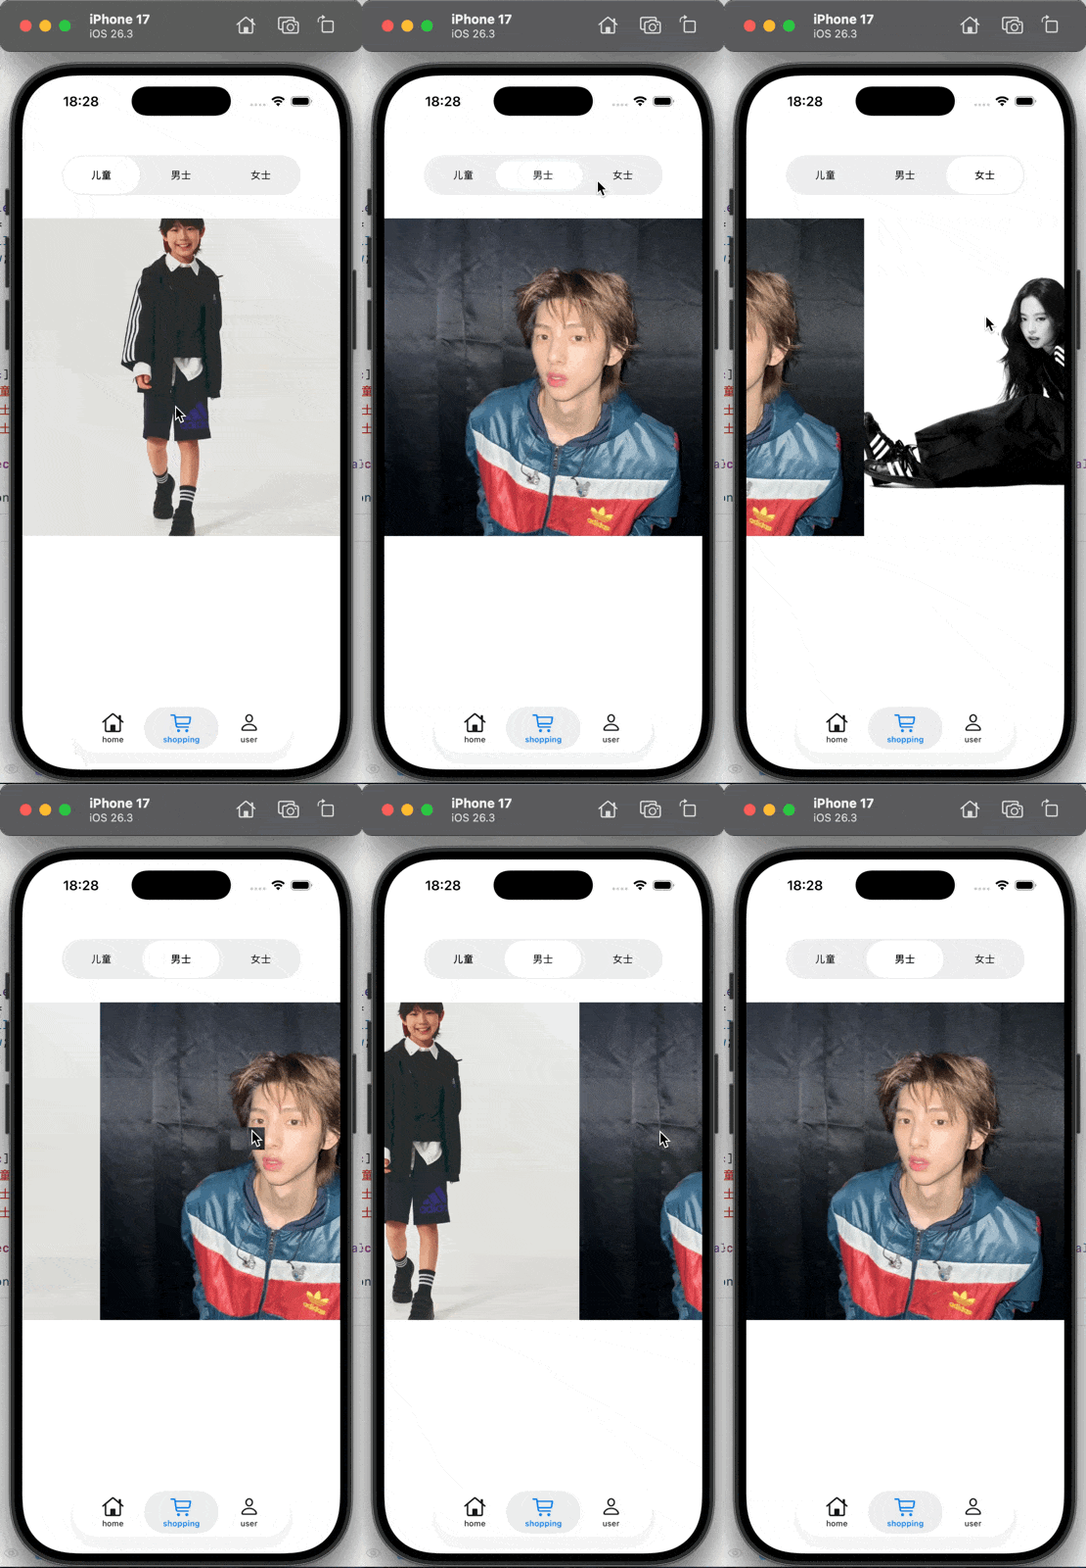
这里我通过两个分栏控制器来实现我们的第二个页面,这个页面的内容比较简单,我们仅仅只用将两个UI控件的协议函数链接起来,我们就可以实现这个部分的内容
-(void)segChange{
    NSUInteger index = self.segControl.selectedSegmentIndex;
    CGFloat newX = self.scroll.bounds.size.width * index;
    [self.scroll setContentOffset:CGPointMake(newX, 0) animated:YES];
}
-(void)scrollViewDidScroll:(UIScrollView *)scrollView {
    CGFloat offSetX = scrollView.contentOffset.x;
    CGFloat width = scrollView.bounds.size.width;
    if (width <= 0) {
        return;
    }
    NSInteger index = offSetX / width + 0.5;
    index = MAX(0, MIN(index, self.segControl.numberOfSegments - 1));
    if (_segControl.selectedSegmentIndex != index) {
        _segControl.selectedSegmentIndex = index;
    }
}
主要通过这两个方法实现两个控件的交互
三、个人页面(TableView和照片墙以及多界面传值)
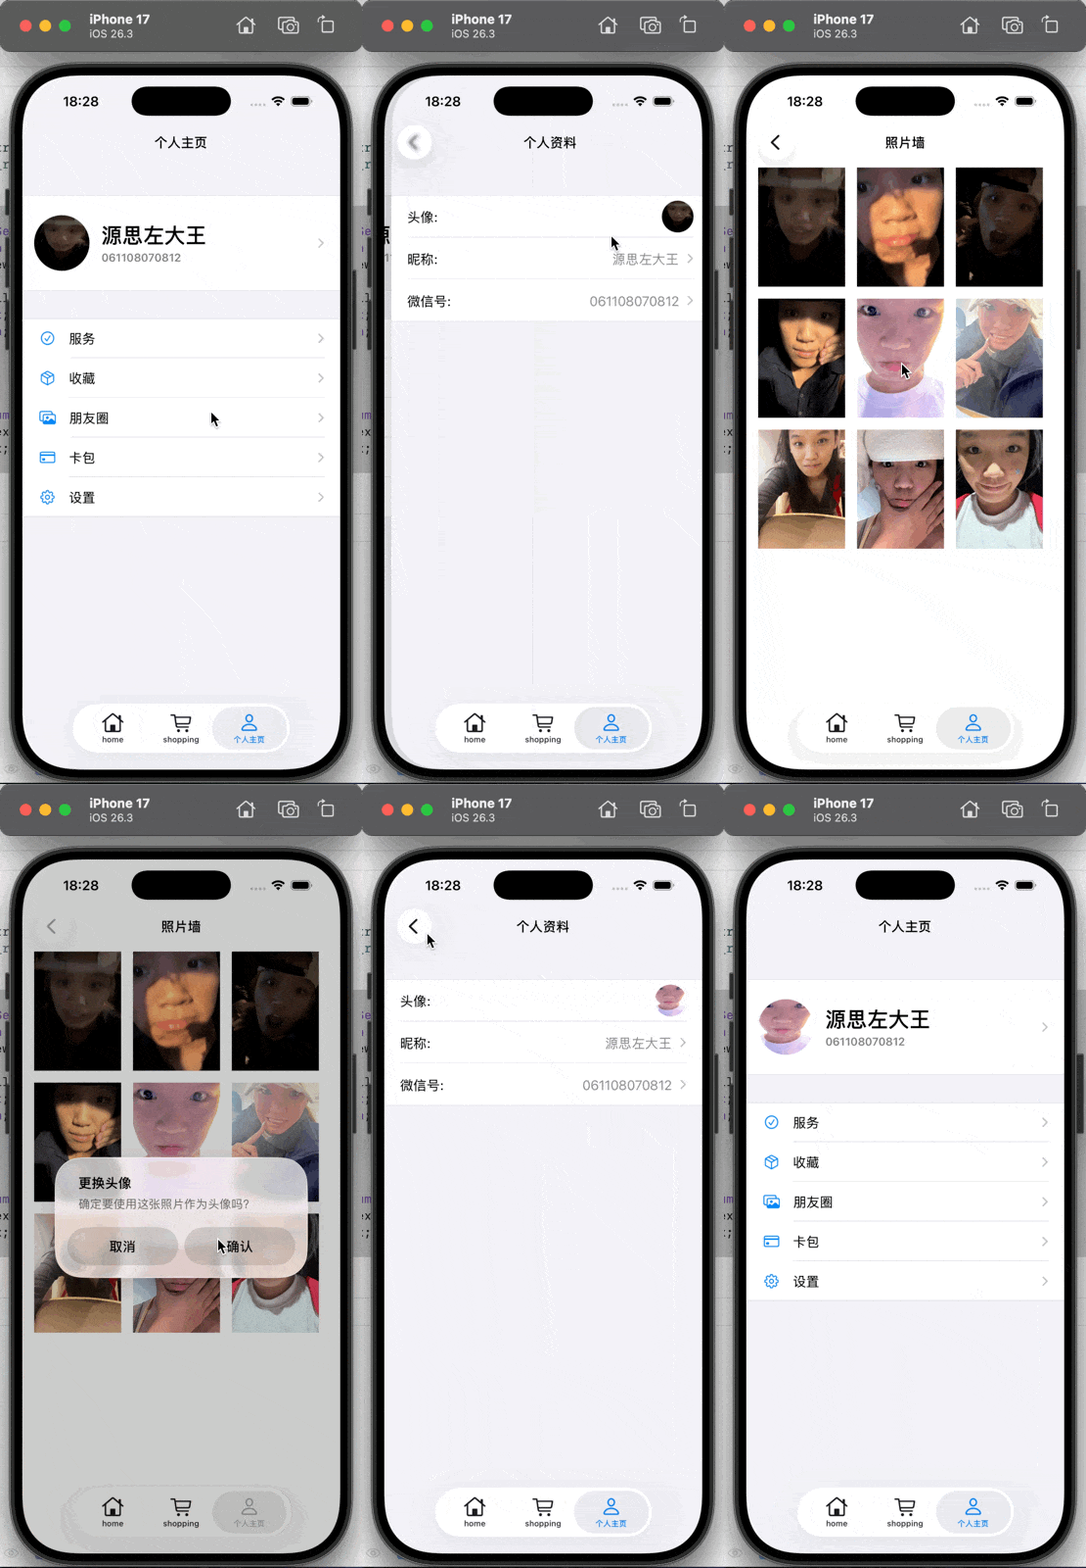
照片墙以及TableView都比较简单,在此我只给出实现效果,重要的还是利用通知传值实现头像的传递
    [[NSNotificationCenter defaultCenter] addObserver:self selector:@selector(avatarDidChange:)
name:@"AvatarDidChangeNotification" object:nil];
-(void)dealloc {
    [[NSNotificationCenter defaultCenter] removeObserver:self];
}